Visiting Glamping El Color de mis Rêves: a dream trip to Manizales
Manizales and its surroundings have become one of the most interesting zones in Colombia for birding 🐦 , with a very complete offer for ecotourism destinations. Hotel and tourism infrastructure in the area is exceptional, roads are in very good shape and you can get to a bunch of places in just 1 or 2 hours.
With species so charismatic as the Andean toucans, a variety of Antpittas and a whole lot of colorful Tanagers, this Colombian region is a must visit place for people that enjoy bird photography and birdwatching.
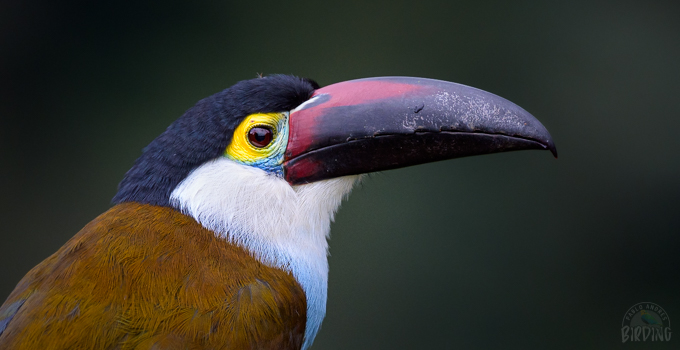
I had dreamt about doing this trip, from the moment I knew there were places in which you could see the Black-billed Mountain Toucan this close.
I chose August (2021) because I had good availability of days off from my job 👨✈️, so I started gathering information about the two places I wanted to visit (Hacienda El Bosque and Glamping El Color de mis Rêves). I didn’t know much about the process in those places and about what I would face, photographically speaking, so I gave Memo Gómez a call as he already knew both sites.
Memo was very helpful and gave me all the information. He suggested to stay at least 2 nights at the Glamping, due to the number of species and photography opportunities there. He also gave me some important advice about the logistics of the place, the importance of verifying the availability of Carlos Mario Aranzazu, the place’s guide, and the possibility of using some lighting equipment.
Having the information, I decided to book 2 nights at the Glamping and 2 nights at Hacienda El Bosque. I chose to stay first at 🏕 El Color de mis Rêves because the logistics to get there is a bit more complex, due to its location (something that makes the experience even more interesting), so it was easier for me to start the photography expedition there.
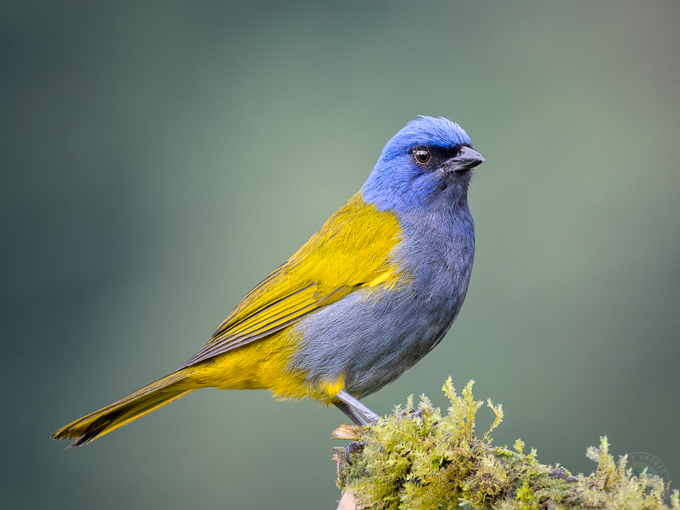
🎒 Required Equipment
This is a list of the gear and accessories I took with me. It could serve as a guide for the equipment that you might need.
📸 Photography gear
- Two cameras:
- Nikon Z7 II + 500mm PF lens for photography.
- Nikon Z6 + 28-300mm lens for video.
- 6 camera batteries. (It’s important to have spares because they will discharge faster in cold weather).
- 2 battery chargers.
- Sony CFexpress and XQD cards, 256GB in total.
- Additional SD cards as backup (you have to keep in mind that these are very slow for this type of cameras).
- Godox TT350 flash.
- LED light.
- GoPro Hero 5 Session camera for first person recording.
- Charger and rechargeable AA batteries.
- Manfrotto Befree Live carbon tripod.
💻 Additional gear
- Laptop.
- XQD and CFexpress card readers.
- Sandisk Extreme SSD 2TB portable drive for backups (it fits in a shirt pocket, it’s extremely portable, light and small).
- Necessary cables.
- 10.000mAh Powerbank.
🧥 Clothes
- In general, cold weather clothes.
- Winter or thermal coat/jacket. Specially for nights. During the day you could wear a not-too-warm jacket or maybe even don’t wear any at all during some hours.
- Thermal underwear or layers. At night these could be helpful, even more if you’re not used to cold weather (don’t worry, it won’t get below zero).
- Boots / Rubber boots. The Glamping is located in a cloud forest, it’s a wet zone and it rains frequently so pathways can get very muddy.
🛣 Route
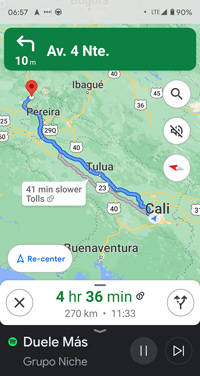
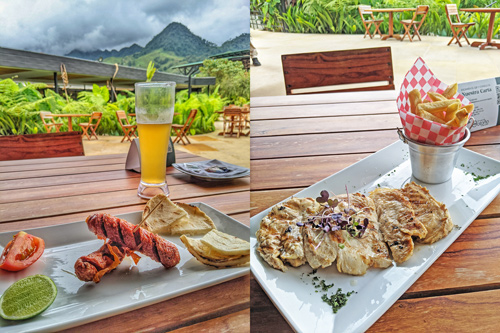
The trip took me about 4:30 hours to the pick-up point. The road is double lane almost the entire length and its in very good shape (though it’s usual to find some working zones). It rained almost half the time and this got me worried about the weather in my final destination (this turned out to be of no concern, however). I arrived at 11:30 a.m. and decided to have lunch at Termales El Otoño Hotel’s restaurant (it’s about 100 meters from the pick-up point).
Afterwards, I got to the meeting point, where you leave your car parked and I got picked up at about 2:45 p.m. to start our way to the Glamping.
🚙 Here starts the adventure.
Note: logistics for the Glamping is special because you can only get there in a 4×4 vehicle. That transfer is included in the package, however there are fixed check-in and check-out times. You can’t arrive or leave anytime. This is important to know for when you’re planning your trip.
😎 First impressions
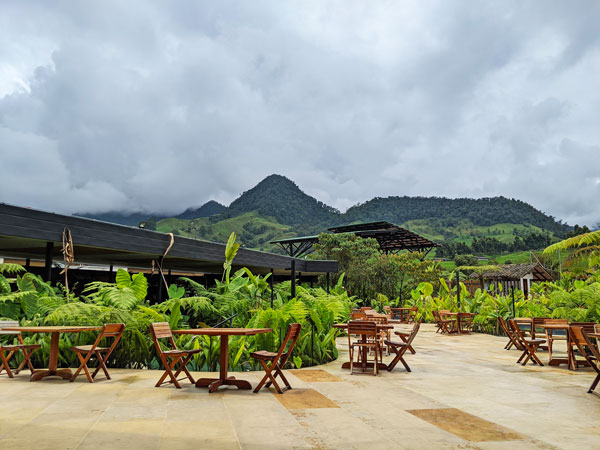
Carlos Mario Aranzazu, the Glamping’s guide at that moment (nowadays –2022– it’s his son Mateo), picked me up in one of the 4×4 trucks that are used for the transfers to and from the place. The Glamping is literally located in the middle of nowhere, right in the heart of the mountains (🌄 one of its main appeals) and to get there you need to cross a river and drive on a very rough road. This is impossible without a proper vehicle. Special suspension and tires and very good driving skills for these types of tracks is needed. Carlos Mario made it look very easy but clearly it is a duty for those with the expertise.
👍 From the moment I had the first contact with Carlos Mario I felt the vibe of a person passionate about what he does, warm, chatty, very active and dynamic. Full of anecdotes and good laughs 🤣. That good vibe that only people from the Colombian countryside can convey so well. Even though we had only met each other for less than an hour, Carlos Mario made me feel like we were all time friends. From that very first moment I felt very welcomed.
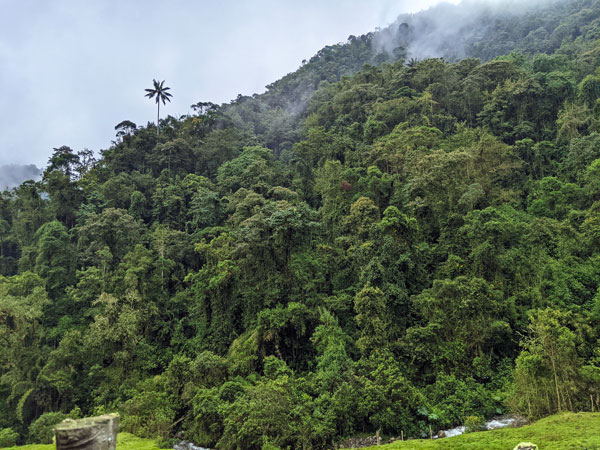
The route to the Glamping took about 20 – 30 minutes, and we got to know each other with Carlos Mario and shared some stories (he has quite a wide and peculiar repertoire).
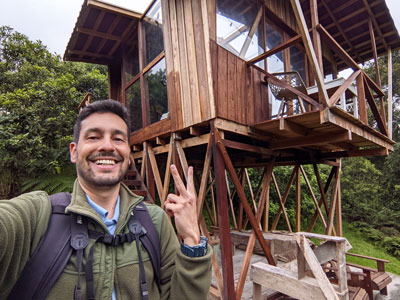
We arrived at about 3:20 p.m. and I went straight to my cabin (Toucan) to leave my stuff and immediately got ready to start the photographic journey. There was still good light that afternoon. I had planned to use the rest of the day for getting to know the place and getting an idea of the conditions I would face, so I could plan on how to shoot.
🤯 First Photos
You realize you are in a very special place, and that the trip is going to be memorable, when just as you’re leaving your cabin you find this little fella (Purple-backed Thornbill – Ramphomicron microrhynchum) and he greets you in all its glory. I found him visiting some bushes that surround the cabin and for a moment he perched right in front of me, very short range, and gave me the opportunity to take some photos.
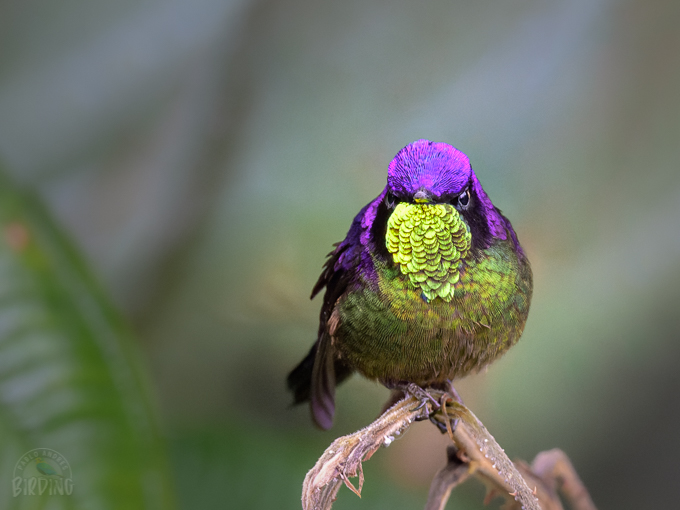
With this reception, I knew that what awaited for me in the next days was going to be exceptional 👌.
Then, in a tree some 20 meters in front of the cabin’s balcony, I had this other view of one of the objectives of the trip, the beautiful Black-billed Mountain Toucan (Andigena nigrirostris) preening at the end of the afternoon.
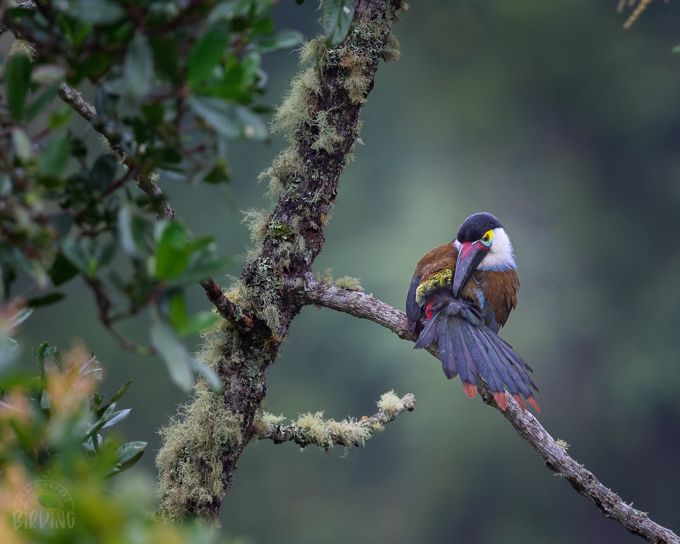
The next step was to start visiting the different photography stages of the place so I could understand bird interactions and dynamics and I could plan the photographs of the next couple of days. Truth be told, even though it was already past 4:00 p.m., lighting conditions were still very good.
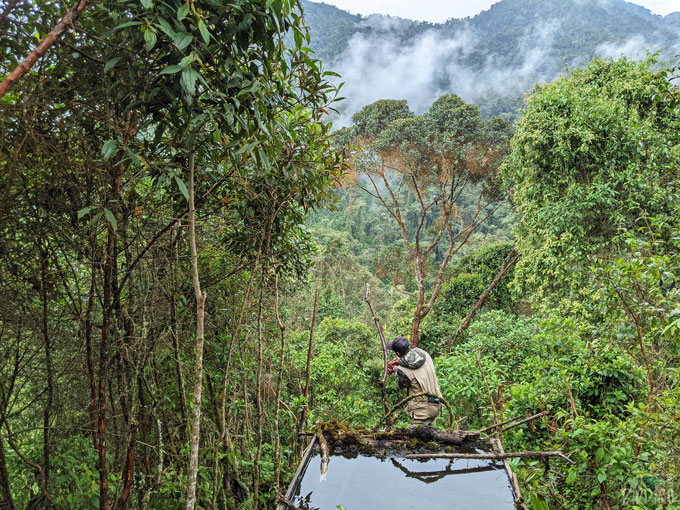
Depending on how cloudy it is, at the Glamping you’ll probably have adequate light conditions well after 4:00 p.m. or even 5:00. In fact, that cloud layer (when it’s not so thick and it’s white instead of gray) could really help you for bird photography. 🌤 In cloud forests, during the day, it’s common to have thin layers of clouds that work as a natural diffuser, creating very homogeneous lighting that, from my experience, may contribute to bird photography.
In general, it’s not ideal to have direct sunlight on the subjects because this can generate a very strong contrast and a lot of times this goes against the photographic process. This rule has of course exceptions. For example, hummingbird photography, in which direct sunlight could be of aid depending on what you’re looking for. But this is probably a topic for another post.
Back to what concerns us, this first afternoon I focused on the Mountain Toucan, although I also photographed other species. One of the surprises of the afternoon was the Dusky Piha (Lipaugus fuscocinereus).
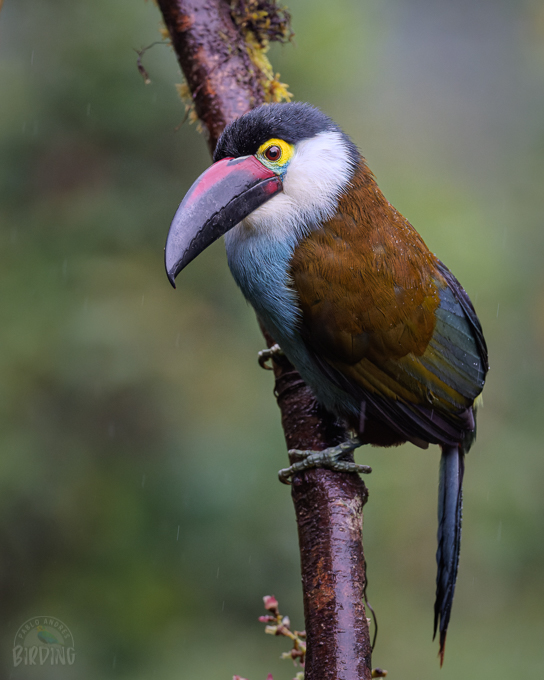
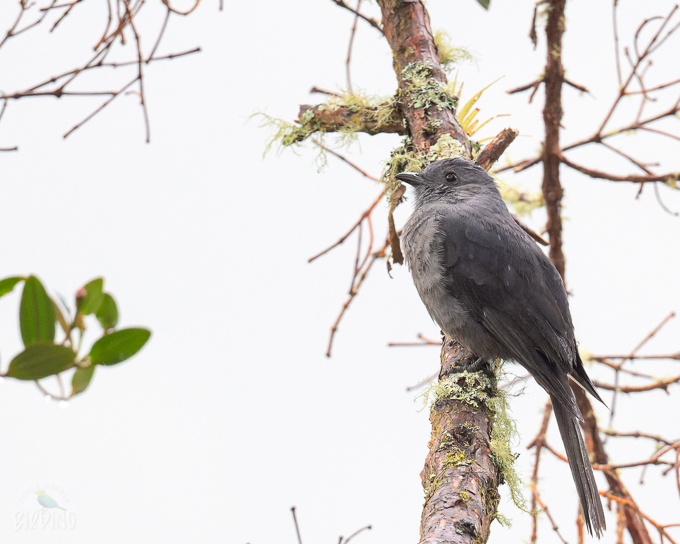
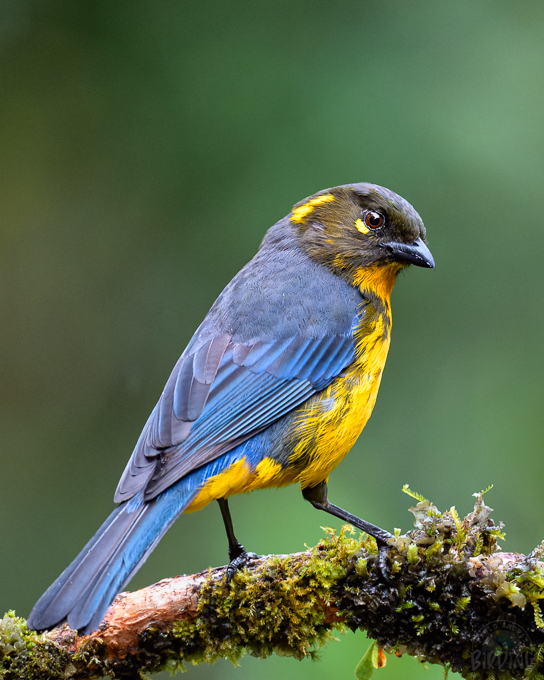
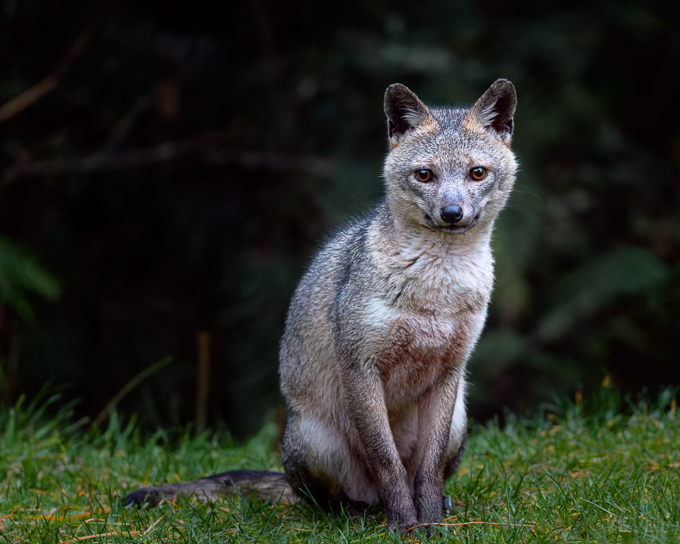
🦊 This first day ended with some photos of one of the most wanted characters of the place, the Crab-eating Fox (Cerdocyon thous).
🛏 Wrapping up the first day
Having finished the first day, it was moment for an essential task in these kinds of trips: download the photos from the memory cards, so you can start the next journey with all your memory space available. This is of the utmost importance when you’re on the field, even more in places with such great photographic opportunities like the Glamping. It would be unforgivable to run out of memory space and not be able to register the moment or the bird of the trip (due to lack of memory space). The amount of pictures you take can be so high that sometimes this process must be done twice a day.
I performed the task in the main house. After finishing, having a light dinner with a 🍻 beer, and sharing some time with Carlos Mario and the girls in charge of the Glamping, it was time to go back to my cabin to prepare my gear for the next day and rest 😴.
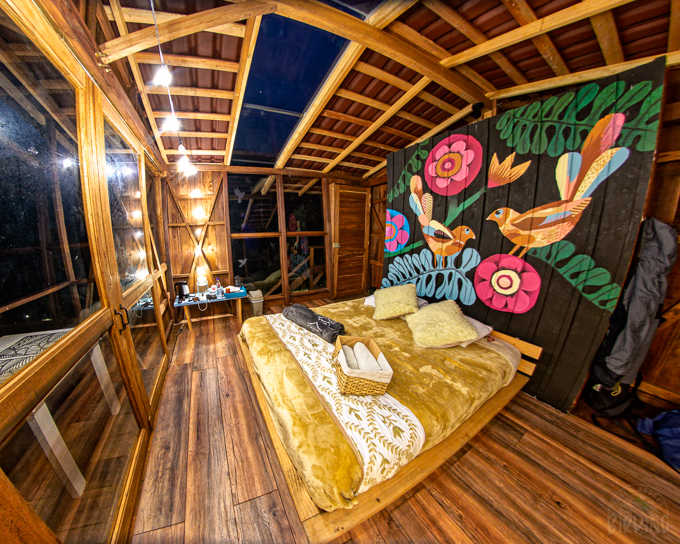
Having organized my gear and left my batteries charging, I went to bed to recharge energies after a long, and exhausting, but very exciting journey.
Note: all bird photos were taken handheld. This is one of the advantages of the Nikon 500mm PF lens. Due to its size and weight (very light) it allows me to work like that.
🤓 Pro-Tip
The night and early morning in the cloud forest can become quite cold, so it is not only necessary to have the right clothing, for a good rest, but also to protect our photography gear.
At the Glamping, tents and cabins have beds that are well prepared for cold weather. It is important, nonetheless, to complement that with suitable clothing that allows you to have a restful night. This is something that depends on how warm or cool each person likes to sleep. My advice, however, would be to have some thermal underwear or layers with you, if it’s the first time you spend the night at this type of environment.
For equipment, what I did was to place one of the cameras in the backpack and wrapped it with the blankets provided for the balcony. The other camera I also wrapped it and placed it inside the basket they give you with the towels. I placed everything near the bed. The idea here was to avoid the gear to get extremely cold overnight 🥶. The reason is simple: if cameras get too cold, the next day when you’re using them in the morning, more notably if its a sunny day, the temperature change will be abrupt, sunlight will reflect directly on the equipment (heating it up very quickly), and this will generate condensation that might be very difficult to handle and could leave you without the possibility of taking pictures for as much as half an hour.
This issue reduces if you use prime objectives that are sealed. However, condensation could be generated in the external lenses or the internal one that faces the camera body.
It’s important to take this into account and it’s probably a good idea to plan your journey so you may have at least half an hour to acclimatize your gear before you start shooting. This can be achieved by leaving your camera out in a safe place that’s at the same ambient temperature of the place you’ll be shooting (for example in a table outside the cabin). In case the sunlight is directly hitting your camera while shooting, protecting it from direct exposure could help you avoid a rapid change in temperature, thus avoiding condensation. Anyhow, in mirrorless cameras, the body tends to generate heat while using them and this could also contribute to condensation.
In conclusion, it is always a good idea to have at least 30 minutes of margin before starting to shoot.

